In our last post, we walked you through how to kickstart your lemon-growing journey by pre-sprouting seeds using the simple ziplock bag method. If you’ve been following along, your seeds should be showing signs of life by now – those little sprouts are ready to hit the soil!
Moving your lemon seedlings to their new home is as easy as it sounds: gently bury the roots in the soil, and you’re basically done. Simple, right?
Well, almost. There’s a little more to it if you want your lemon seedlings to truly thrive. Let’s dive into the details…
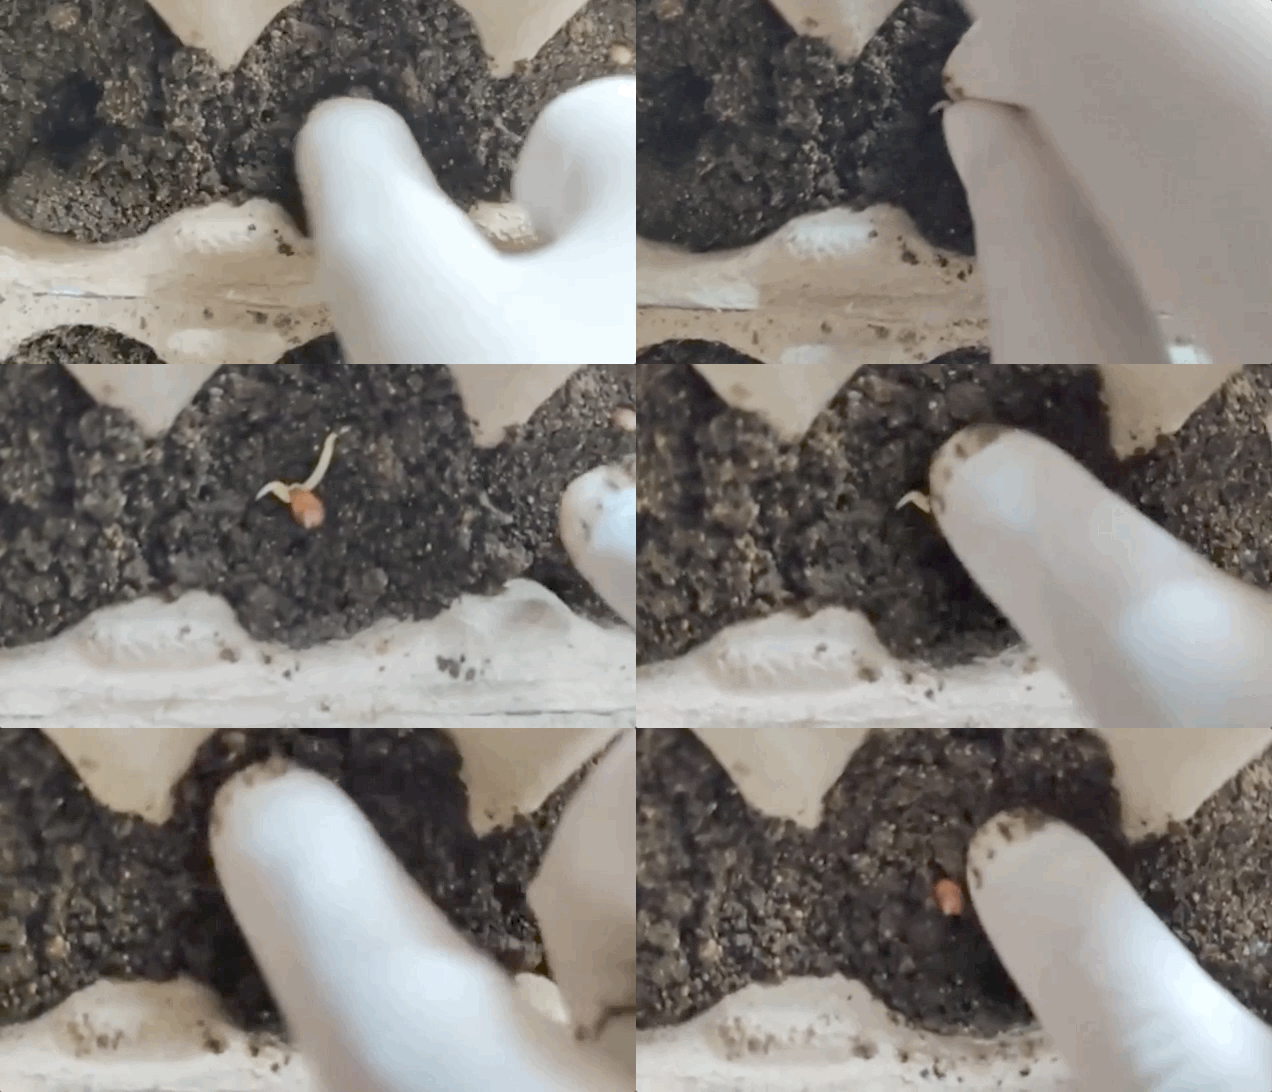
What are the things to keep in mind to ensure its survival?
What’s the secret to ensuring those tender lemon sprouts thrive once they’re out of the bag? It all starts with the right container and soil environment.
Soil Container Size: Small but Mighty
It might seem logical to think that a bigger pot with more soil would be better for your tiny plant, but that’s not always the case. While soil provides essential nutrients, a pot that’s too large can hold excess water, leading to soggy conditions that invite mold and root rot.
So, what size is just right? A pint-sized pot with a diameter of 3 to 4 inches is the perfect nursery for your lemon sprouts and seedlings. This size allows for adequate drainage and prevents the roots from drowning.
No Pots? No Problem!
If you don’t have any pint-sized pots on hand, get creative! Cardboard egg cartons make surprisingly effective seedling homes. Their individual compartments are the ideal depth for holding soil, and the cover comes in handy later on (more on that soon!).
Why Size Matters
Choosing the right container size is crucial for the following reasons:
- Drainage: Smaller pots drain more quickly, preventing waterlogged soil that can lead to root problems.
- Root Development: A snug fit encourages healthy root growth and prevents the roots from becoming too spread out.
- Disease Prevention: Proper drainage and airflow in smaller pots help to deter mold and root diseases.
- Ease of Transplanting: When it’s time to move your seedling to a larger pot, smaller containers make the process less disruptive.
Remember, starting small doesn’t mean your lemon tree will stay that way. As it grows, you’ll gradually transplant it into larger containers, allowing its roots to expand and flourish.
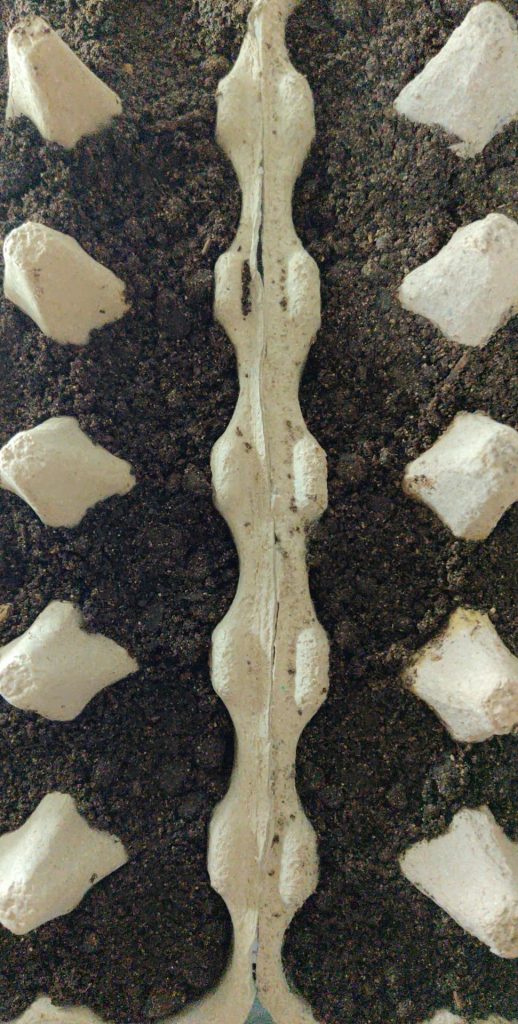
Now that you’ve got the perfect container, let’s get those sprouts in the ground!
Planting Depth: The Rule of Thumb (or Finger)
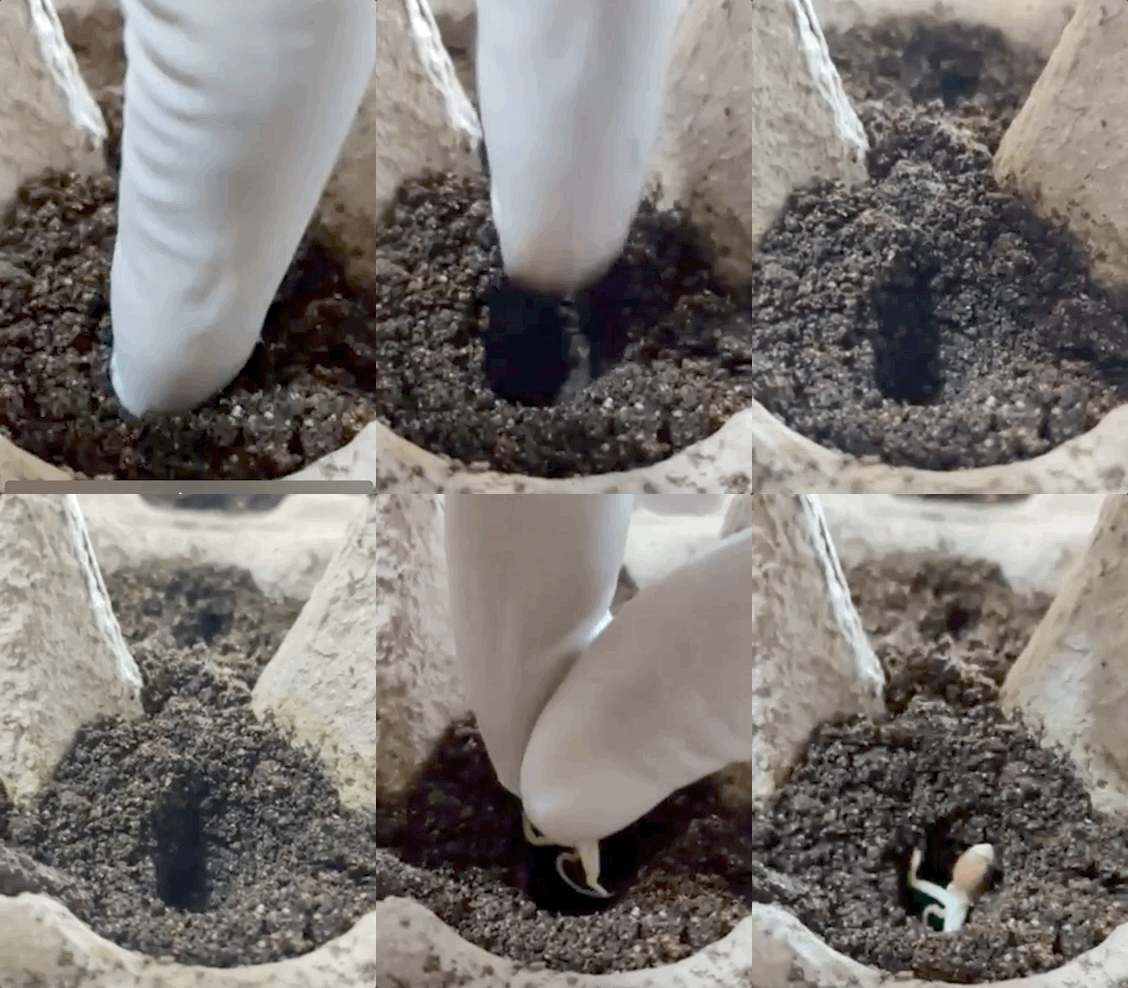
There’s a general rule of thumb for planting seeds: bury them at a depth twice their width. For example, a half-inch wide seed should be planted about an inch deep. However, tiny seeds like those from tomatoes or peppers can rest comfortably on the soil surface with just a light dusting of soil on top.
Pre-Sprouted Lemon Seeds: A Slightly Different Approach
Our pre-sprouted lemon seeds require a slightly different technique. Use your index finger to create a hole about an inch deep in the soil. Gently place the sprout in the hole, making sure to cover the roots while leaving the main seed exposed just above the soil surface. This allows the seed to access sunlight while the roots establish themselves.
Water Generously: The Final Touch
After planting, give your lemon sprout a generous watering. This helps settle the soil around the roots and ensures they have enough moisture to kickstart their growth.
Why Planting Depth Matters
Getting the planting depth right is crucial for several reasons:
- Germination: Seeds need the right amount of darkness and moisture to germinate successfully.
- Root Development: Proper depth encourages healthy root growth and prevents the seedling from becoming top-heavy.
- Disease Prevention: Too much soil cover can hinder germination and increase the risk of rot.
Remember, patience is key when it comes to growing lemon trees. With proper care and attention, your little sprout will soon transform into a thriving plant, bringing you the joy of homegrown lemons for years to come.
Maintaining the Right Moisture: A Delicate Balance
Hot summer days can quickly zap moisture from your potting mix, putting your young lemon seedlings at risk. To keep the soil consistently damp, try these tips:
-
Cover Up: Remember that egg carton cover? It’s not just for storing eggs! Place it over the seedling tray to create a mini greenhouse effect, helping to retain moisture and maintain a humid environment.
-
Mist Away: Keep a water sprayer handy to give your seedlings a gentle misting throughout the day. This not only hydrates the soil but also cools the leaves, preventing them from drying out.
Sunlight: A Gradual Introduction
While lemon trees love sunlight, too much direct sun can be harsh on delicate seedlings. Keep them covered until you see the first signs of stem and leaf growth. Once those leaves emerge, gradually introduce your seedlings to sunlight, starting with a few hours of morning sun and gradually increasing their exposure.
Leggy Seedlings: A Sign of Trouble
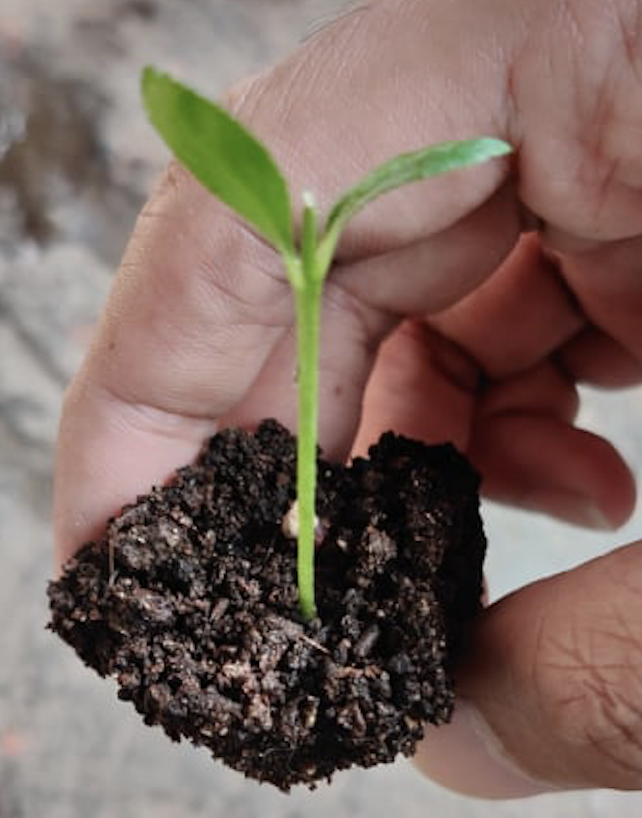
If your seedlings start to become tall and spindly with weak stems, it’s a sign they’re not getting enough light. This is called “leggy” growth, and it can make your seedlings more prone to breakage and disease. Make sure they get plenty of indirect sunlight to encourage strong, sturdy growth.
Thinning Out: Giving Seedlings Room to Grow
As your lemon seedlings mature, they’ll start competing for resources in the limited space of the egg carton. To prevent overcrowding and nutrient deficiencies, it’s important to thin them out. Transplant the strongest seedlings into individual pots, giving them the space they need to develop into healthy, productive lemon trees.
Transferring Seedlings – Mind the Roots
Roots are delicate and require a gentle touch when transplanting to prevent shock. Follow these steps for a successful transition:
Water the Soil: Before transplanting, thoroughly water the soil in the egg carton. This not only hydrates the plant but also helps the soil stick together, protecting the roots during transfer.
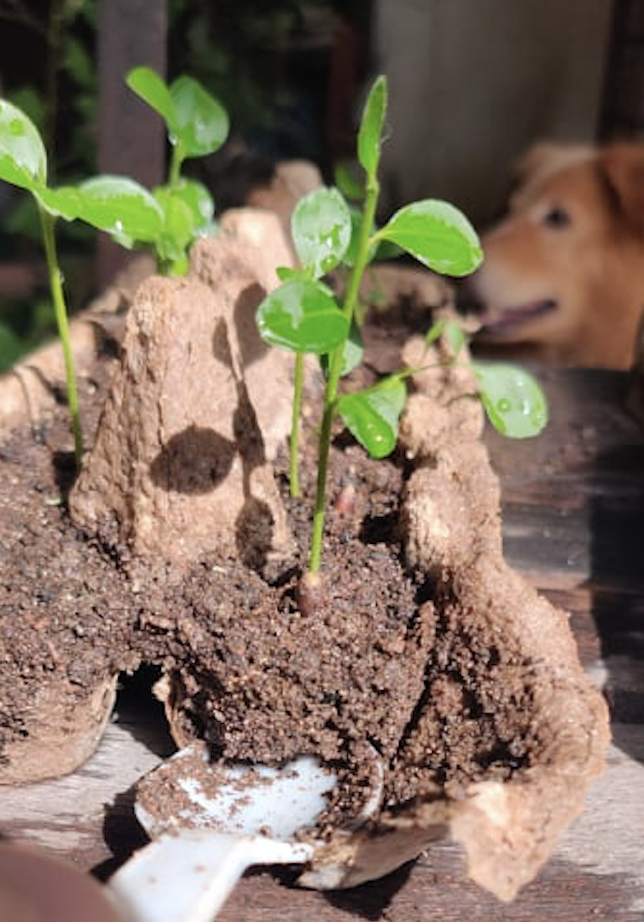
Gentle Extraction: Carefully loosen the soil around the seedling using a spoon or small trowel. Gently lift the entire root ball, avoiding any tugging or pulling that could damage the roots.
Prepare the New Pot: Fill your chosen pot with potting mix and water it well. Create a hole in the center slightly larger than the root ball.
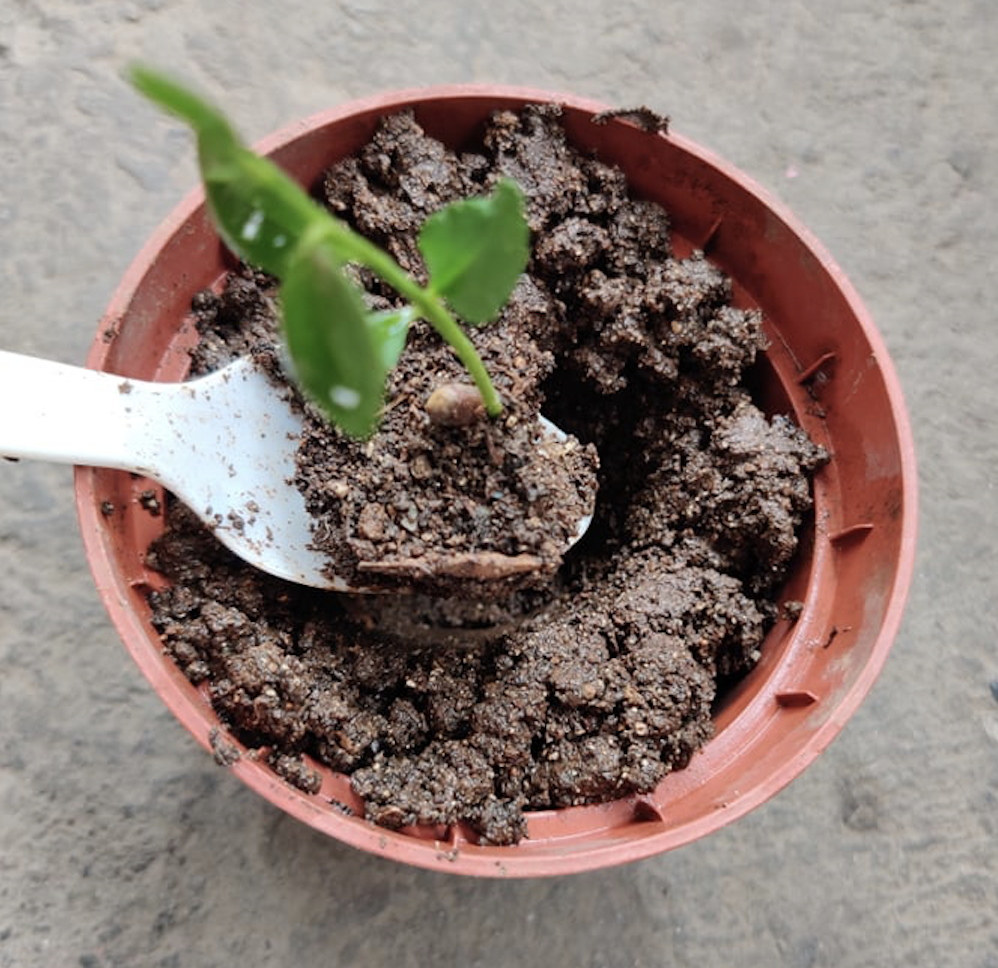
Planting and Covering: Place the seedling in the hole, ensuring the roots are fully covered with soil. This time, you can bury the main seed entirely as the roots are now established enough to support the seedling.
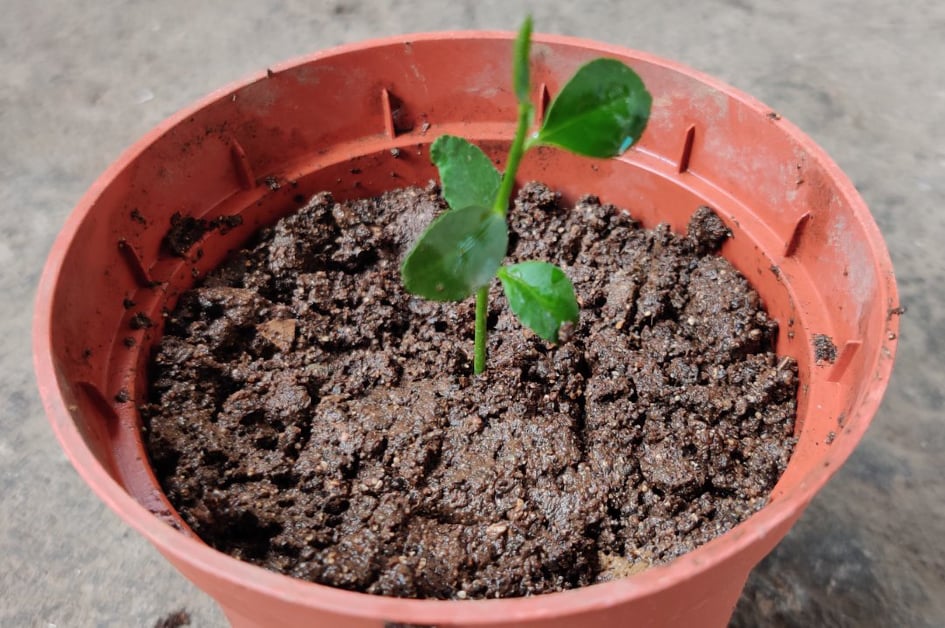
Watering and Sunlight: Water the newly transplanted seedling thoroughly and place it in a location with indirect sunlight. Avoid direct sunlight until the seedling has adjusted to its new environment.
Check out this avocado time-lapse with water nutrient comparison:
Please don’t forget to like and subscribe for more comparison videos.
